I just got my order in the mail today, so I'll be able to use Mordheim-y models in the next two parts

If I get to a fourth part, I'll do some Chaos-y detailing for a Possessed warband--I was going to complete a Reiklander band first, but I do have a lot of ideas for making stylish Brethern and Mutants from the Militia sprues.
EDIT: Or I'll do a Brethern in this technique
 Technique #2 - Makin' Capes (and Robes)
Okay, Fillin' Gaps isn't very exciting. It's a basic skill you need for model assembly and is pretty easy to master, but it doesn't exactly qualify as converting. With Technique #2, Makin' Capes, I'm going to demonstrate a simple method for taking a model and making something completely different out of it.
Tools used: Greenstuff, water, peanut oil, sculpting tool and Town Cryer 6 for some inspiration
The Empire Militia set is a great set, but it lacks variation. The Mordheim Possessed set is a great set, but it lacks bowmen. So let's combine the two and make a Brethern bowman.
I'll start by selecting the torso, legs and head I like the least (because I will mostly be covering it up) and mock up a pose using blu-tack. Comparing it to my inspiration, it looks like we have a long way to go.
 +
+  = ???
= ???I'll need to do a robe bottom to cover the legs, some oversleeves, a shoulder/cape thing and a hat. I need to make sure it'll work with the model parts that will still show, so I have to do a little thinking.
The torso is the "pirate jacket" which has a bit of shirt showing through. It has two layers, so my robe bottom should have two layers--the inner layer will only be in the front and I'll do that first then the outer layer and sleeves. Then a long cape in the back and shoulder covering over that and end with the mask and hat.
It is very important to plan the conversion out. If I did the cape first, I'd have to crack it off to do the robe bottom. Snapping off Greenstuff capes is fine and usually safe, but you have to let the GS fully harden and I don't want to wait once I start going.
Capes and robes both use the same basic technique: make a ball of Greenstuff, flatten it, let it set up a bit, cut it to dimension, slap it on and form creases.
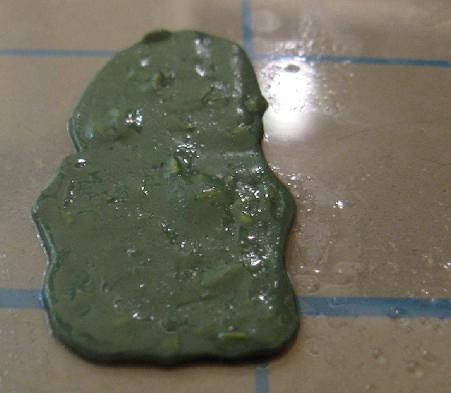
I layout a peice of plastic sheet (the kind used for overhead projectors--ask your grandpa what those were) and spread a small puddle of oil. I then grab a suitable amount of Greenstuff, work it into a ball, flatten with my wet fingers and then roll it flat over the oil puddle.

I use my x-acto knife handle as a rolling pin and make it pretty thin (too thin actually). You can use any non-porous cylinder as a rolling pin, just grease it up and you're good to go.
After waiting about 5-10 minutes for the Greenstuff to firm up a little, I cut it to size. In this case, I leave the sides uncut as those ends will be covered over and the extra will help me mount the robe bit.

Using the point of my knife, I can now lift the Greenstuff off the plastic sheet. It's basically an al dente noodle in consistancy, it flops a bit, but doesn't stretch or deform unless I want it to. So I position it on the model and make folds and creases with my sculpting tool. I'm using a lot of water because it is still a little bit sticky.
I keep folding and creasing until I get something passable. I keep everything as wet as possible and try to make sure its all smooth.

Meh, not great but good enough--it'll mostly be hidden. If I hate it later, I'll just just redo it. Can't get enough Greenstuff practice.
...more to come...


